What should be done after installation: Porovnání verzí
(Založena nová stránka: cz:Co je třeba udělat po instalaci ru:Что должно быть сделано после установки Assume that you have successfully and properly in...) |
|||
| Řádek 1: | Řádek 1: | ||
| − | [[ | + | [[cs:Co je třeba udělat po instalaci]] |
[[ru:Что должно быть сделано после установки]] | [[ru:Что должно быть сделано после установки]] | ||
Aktuální verze z 5. 8. 2013, 10:12
Assume that you have successfully and properly installed FreenetIS and have filled in the installation form. Most of these data can be changed later in the system, or you can change it manually in the database (if you know how to do this). After installation, if you are logged in as admin, you won't see some features. It because the first member is special and some features logically won't be available, compare to other members.
First member will represent the association. The initial configuration should not be use by anybody else except admin. You can find more information about features and concept in internal program help. It is a small question marks in the blue circle, which will show up information right after you put a mouse over it.
'Last updated August 2012'
Obsah
Address points
FreenetIS uses address points. We worked on user interface and now new street and city can be added during the addition of new member and equipment. It can be done by green button 'Plus'
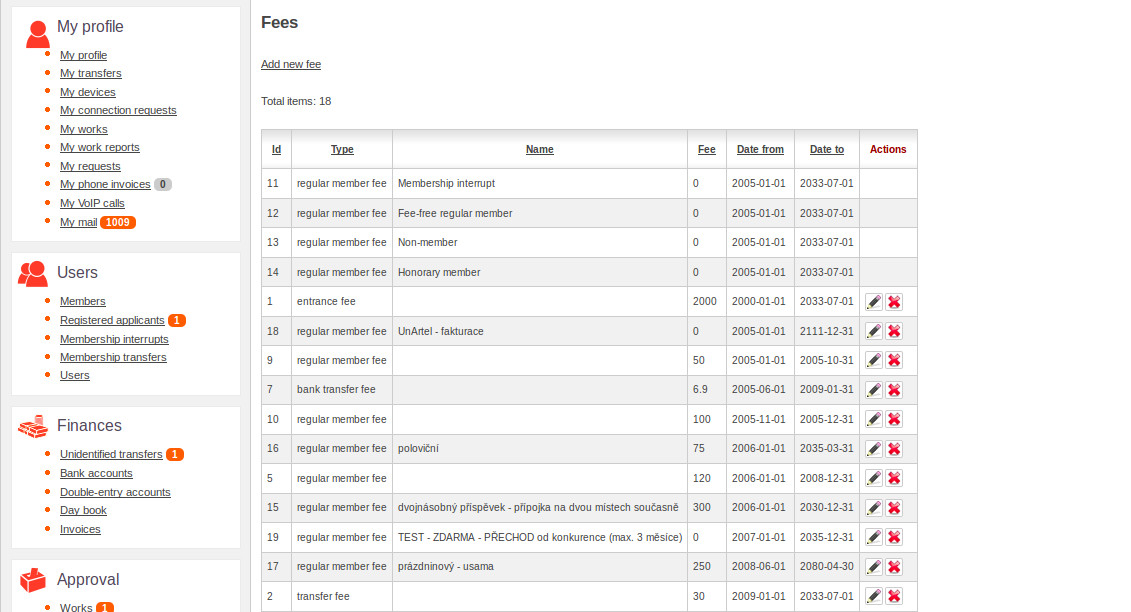
Fees
For proper operation of the system all basic fees should be filled in. Now each member can have different levels of contribution. The default tariffs for member contributions are controlled by tariffs for member with ID 1, which represents the association itself.

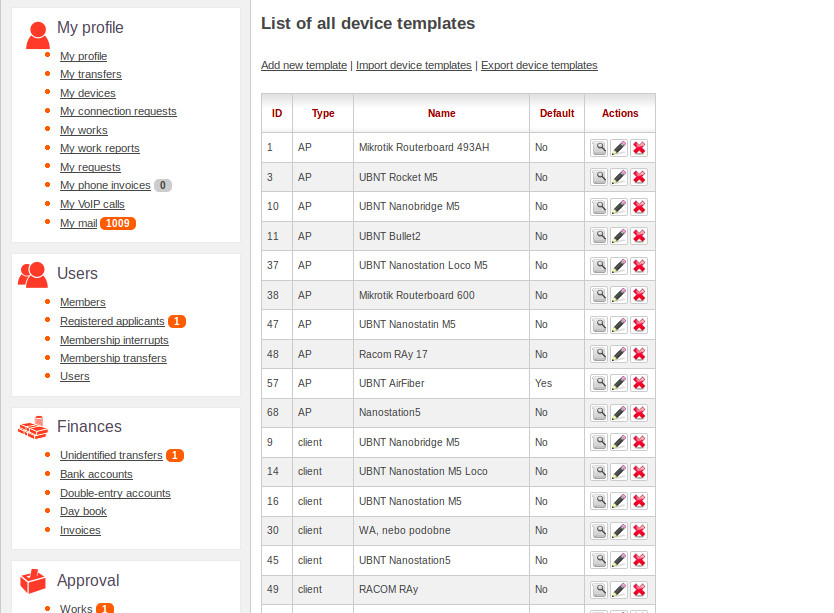
Device templates
During adding device you can use template device. It shows predefined device production, depends on chosen device. You can also import interface templates.
If you do not want to create all the templates from scratch, you can use our predefined templates and export them into the system.

Links and subnets
….Thanks to a better user interface, now it is possible to add new lines during adding a subnet interface, IP addresses or device.
Devices owned by the Association
Devices owned by the association include any active network elements that are owned by the association. For example the access points, routers, switches, servers, etc. It is good to have a backup before adding new devices by yourself. A single device may have multiple interfaces, one interface can have multiple IP addresses, this is helpful for AP or router. Home computers usually have one interface and one IP address.
Members
Now you can add members. Member with ID 1 created after the installation is special. it doesn't have credit account, but has rest of the accounts, its fares start from other members. This member represents your associations in the system. Now, user should not login like admin user, but every manager, engineer, board member, administrator should have a login name of his or her own.
Members devices
Member's devices also has to be stored after new member was added. Usually it is a box and one or more PC. To add device you should to use "Add new device" (it means a single device with its interfaces, IP addresses and links with other devices, according to device template.)
Users
It is not necessary to add new user. Usually, one user creates when new member was added, and it is usually sufficient.
==Finance== Ask if it still like this As soon as you have registered all members, it is possible to import bank statements. It supports HTML listing from Raiffeissenbank and FIO. You can then assign some unidentified payments. When you think that it is a right time you can start withdraw money from the account. This would show all users with a debt. Entrainment of contributions takes place in the middle of each month. So you will need to do this every month since beginning operation of associations. The best is the 16th day of the month. Then you will achieve that each member will know the status of his credit, whether it is paid in advance or owed.
Redirection
Once you have fully registered your networks, all members, imported payment, then you can start with redirection. Turning on the subnet redirection will find all unidentified or undeclared connected people. Turning on the subnet means that the subnet starts to filter central gateway. Those IP address which will want to go to the internet and not to the database will be locked(redirected). Then you can start to call redirection for people with a debt, or others who you want to inform(send notification).